~DIY Lace Pockets~

Tags

, , , , , , , , , ,

There I was, exploring pinterest (as usual, by the way follow me! I’m thecocobean) when I stumbled upon this;

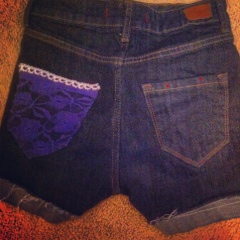
DIY high-waisted shorts with lace pockets.

GAHH. They’re beautiful AND easy, so of course I had to make them! AND make it into a tutorial for you guys!

Here’s what you’ll need;

~Shorts

~Lace

~Scissors

~A needle and thread

~Some type of marking tool

~(optional) Trim

1.Lay out your lace over your pocket(s) and draw an outline of the shape.

2.Cut out the shape.

3.Hand sew the lace onto the pocket the sides and bottom of the pocket, if you aren’t going to sew any trim on the top then you can sew that too. DO NOT SEW THROUGH BOTH LAYERS!!!

4.(Optional)Hand sew the trim on the top.

5.(Optional)Repeat! I didn’t because I like the asymetrical look, but that doesnt mean you can’t do it! Just do whatever you want!

AND YOU’RE DONE!! Now all you have to do is wear them!

20120330-235727.jpg

~ DIY SKULL TEE ~

Tags

, , , , , , , , ,

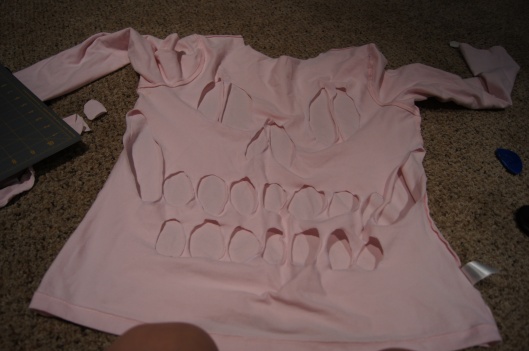
Have you ever seen any of those t-shirts ever that have a bunch of holes in the back that make it kind of look like a skull? Have you ever wanted one? Well, here’s how;

What you’ll need:

~A t-shirt or any type of jersey shirt (preferably looser fitting)

~Some type of marking tool (I used tailors chalk)

~Scissors

~Cardboard or a cutting board

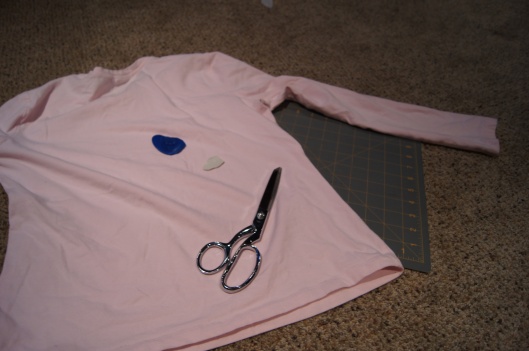
Cut off the neckline, you don’t NEED to but it makes it look better…

Turn your shirt inside out and put your cardboard or cutting board inside. This helps when your marking where to cut and so you don’t cut through both layers.

Now draw with your marking tool where you are going to cut the holes. ^ This is what I did but you can do something COMPLETELY different if you want to. ALSO itdoesn’t have to be perfect, trust me, it’ll look fine.

Now start cutting your pieces out!

After all the pieces have been cut out…

Now take out the cutting board and   S  T  R  E  T  C  H   it out! When you stretch it it will curl the edges over and it gives a really cool effect.

Then I cut off all the hems, turned it right side out and…

TADA!! I’m sorry I don’t have any pictures of me wearing it but I will probably post an OOTD kinda thang so you can see it in action (: This DIY is pretty self explanatory but if you didn’t know how and wanted to make it now you know!!

If you make it post it in the comments! I want to see it! Also post it on my facebook page!

{ DIY SUN JAR }

Tags

, , , , , , , , , , , , , , , , , , , , ,

I know, there are TONS of DIY’s out there for sun jars, why do we need more? Well, we don’t, but here is my version of the sun jar DIY.
The stuff:
~A glass jar with a clear lid. I got mine from walmart for 3 dolla’s
~A solar powered garden light (make sure it fits in the lid before you buy it!!)  Also from walmart for less than 3 bucks.
~Frosting spray. From home depot.
~Silicone (not pictured) Local hardware store.
~Aquafina or Gatorade label (optional and also not pictured) Recycling bin.
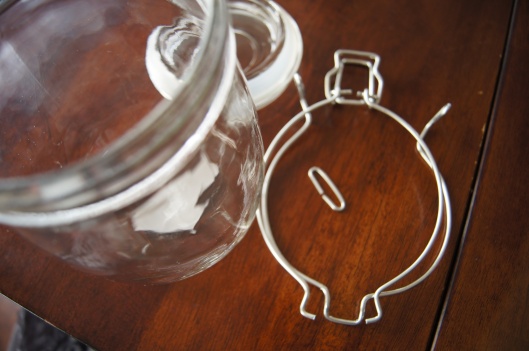
Take the wire parts off the jar.
Now take the sticker (if you have one) off. If you can’t get it all off run the jar under warm or hot water and it should come off, just make sure its COMPLETELY DRY before you spray it with the glass frosting spray.
Take the lids off the garden lights. I don’t know if you can tell but the ones I got have 2 LEDs on each one because one of them is a white LED and the other changes colours. (that ones way better)
Now time to spray those babies. 😉
SHAKE, SHAKE, SHAKE, SHAKE, SHAKE IT !
NOW YOU MAY SPRAY!! Make sure to spray in a well ventilated area so you don’t inhale the fumes. Outside works well but when I did this it was snowing. (IKR?! So annoying…)
Now while you wait for it to dry a little so you can put on the next coat you can put your silicone on. I got my dad to do this part. He spun the lid around while he put it on instead of walking around it to put it on, just in case you were wondering…
Then he licked his finger (I know it might sound gross, but it was so it wouldn’t get stuck to him) and twisted it around to give it a cleaner look. After that we sprayed another coat of frosting spray onto the jars.
And now, we wait…
The next day you can put them back together and put em on your window sill to soak up some sunshine. 🙂
TADA!!!
These are really easy to make, the hardest part is waiting! I hope you get to make some! If you do post a picture on the wall on my Facebook page. Have fun! (;

~ B E D A Z Z L E ~

Tags

, , , , , , , , ,

I love bedazzled things.

There are SO many things people have bedazzled out there. here are some examples;

A Starbucks coffee cup…

A laptop cover (assuming it’s a cover)…

A Vaseline container…

A stapler…

And a… HEAD?!

Some of that stuff is really cool (and weird), but here are some things I think are seriously awesome that have been smothered in rhinestones;

This phone case is really pretty 🙂 I’d just be scared that little pieces would fall off in my purse so I’d probably just carry it around… not that I would mind…

LOVE LOVE LOVE THESE!!! They are amazing! I would DEFINITELY wear these. I would probably wear them with something simple so I wouldn’t draw attention away from the heels (not that anything could) like a little black dress and probably some spikey jewelery.

THIS. This. Is. Gorgeous. Dolce & Gabbana, I love you. Would anyone like to see another wonderful creation from these geniuses?

I knew you would. 😉